Soon after I first started quilting I was listening to the podcast „Quilting for the Rest of Us“, (did I mention how much I love and can’t live without this podcast?). I believe it was Episode 10: “In which we chat with an Appraiser” and Sandy was talking with this AQS Quilt appraiser, Beth Davis, about the importance of labeling your quilts. I became immediately interested in this idea and decided to put a label on my quilt as the appraiser and Sandy had both advised. (To listen to this or any other of her episodes go to the itunes website.)
As I was working on my first quilt at that time, I stored this information away until it came time to put the finishing touches on my quilt. Not knowing how to go about making a quilt label I started searching for how to videos and blog posts on Google and Pinterest.
I was quickly drawn to the handmade variety, and in particular, the embroidered quilt labels; my favorite being those of Leanne Beasley from the Leanne’s House website and blog, who has a very distinctive style. She does fantastic quilts which combine both her love for quilting and embroidery. I urge you to check out her work, it is so inspiring.
Before I could start working on the decorative stitches that went into the quilt label for my first quilt I needed to know how to construct the label itself and prepare it for stitching. For this information I found the following blog posts very helpful:
- “Embroidered Quilt Label Tutorial” by Pickel at swimmininbrine.blogspot.co.uk
- “Embroidered Quilt Label Tutorial” by Heather and Megan at the Quiltstory blog.
If you have never embroidered before, there are a few online tutorials which I found very useful as a beginner:
- “The Hand Embroidery Tutorial – how to personalize a baby quilt” from Sarah at Fairy Face Designs.
- “Hand Embroidery Tutorials” by Jenny Hart at Sublime Stitching
Both have fantastic photos and I would highly recommend you read if you are making your first embroidered quilt label.
I quickly learnt though that there were many different stitches that you could use, and perhaps it was not so practical, having to look up on the laptop each one, every time you wanted to use it. So I began looking for something that offered everything in one place and was practical to print out.
Eventually I came across this PDF file: “The Windflower Stitch Guide” which was created by Jan Kerton and is available at no cost on her website Windflower Embroidery. For any of you down in that part of the world, her online shop is based in Victoria, Australia, and sells patterns and various embroidery supplies; she also offers classes.
The Windflower Stitch Guide is extremely thorough and takes you through the basics, from how to start and finish your work to needle and thread selection. It also details many different stitches and typical forms used in embroidery. Each is presented with detailed step-by-step instructions and is complete with detailed, easy to understand instructions. I have been using her stitch guide, for my last couple of projects and it has proven invaluable. I’m even thinking of having it bound, so I don’t have to carry around my binder. I am so grateful for the work Jan put into this beautiful little guide.
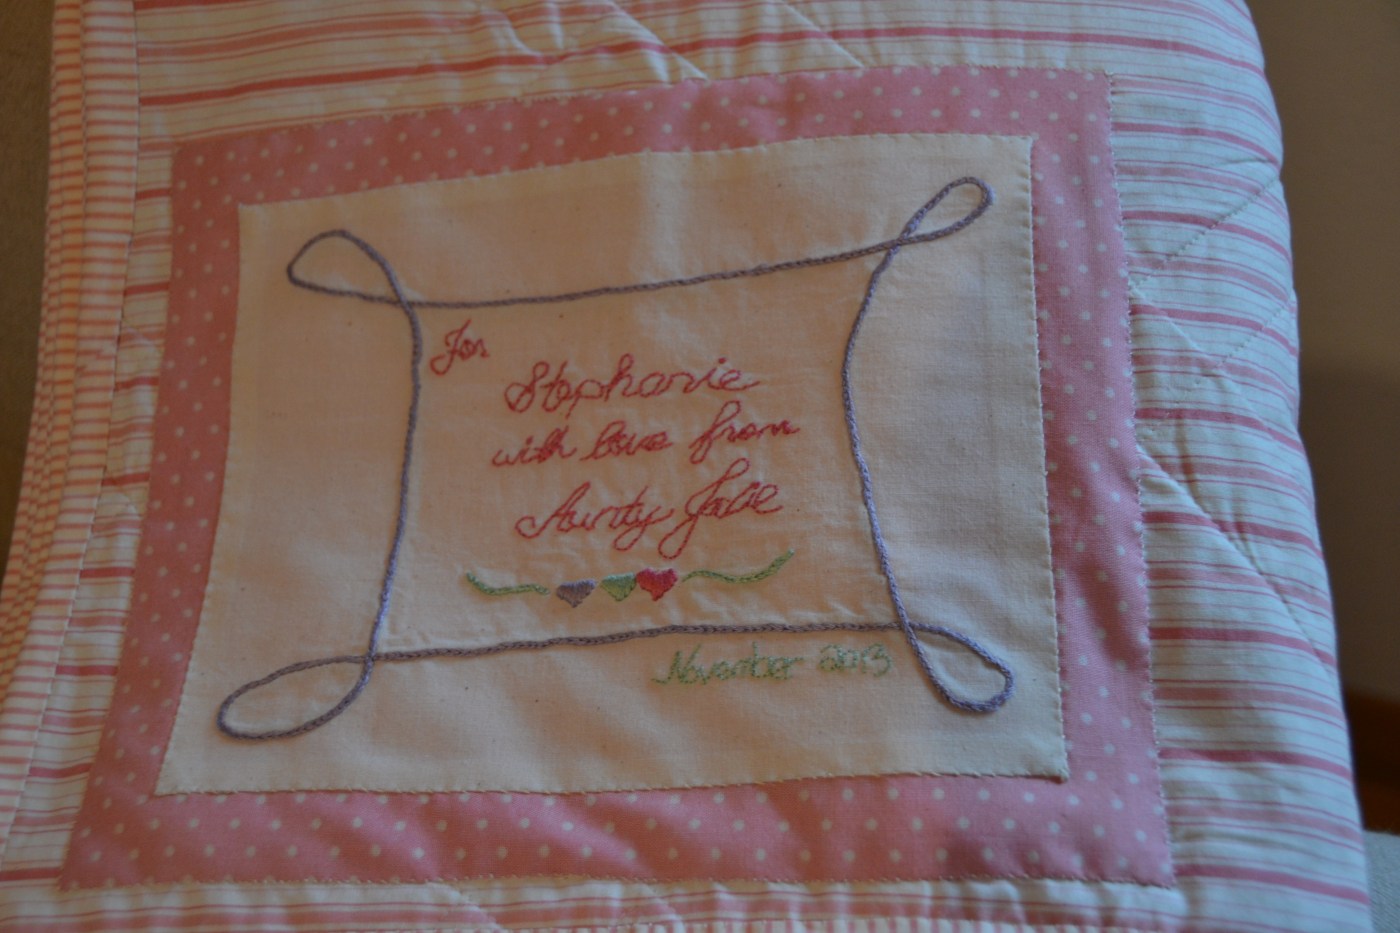
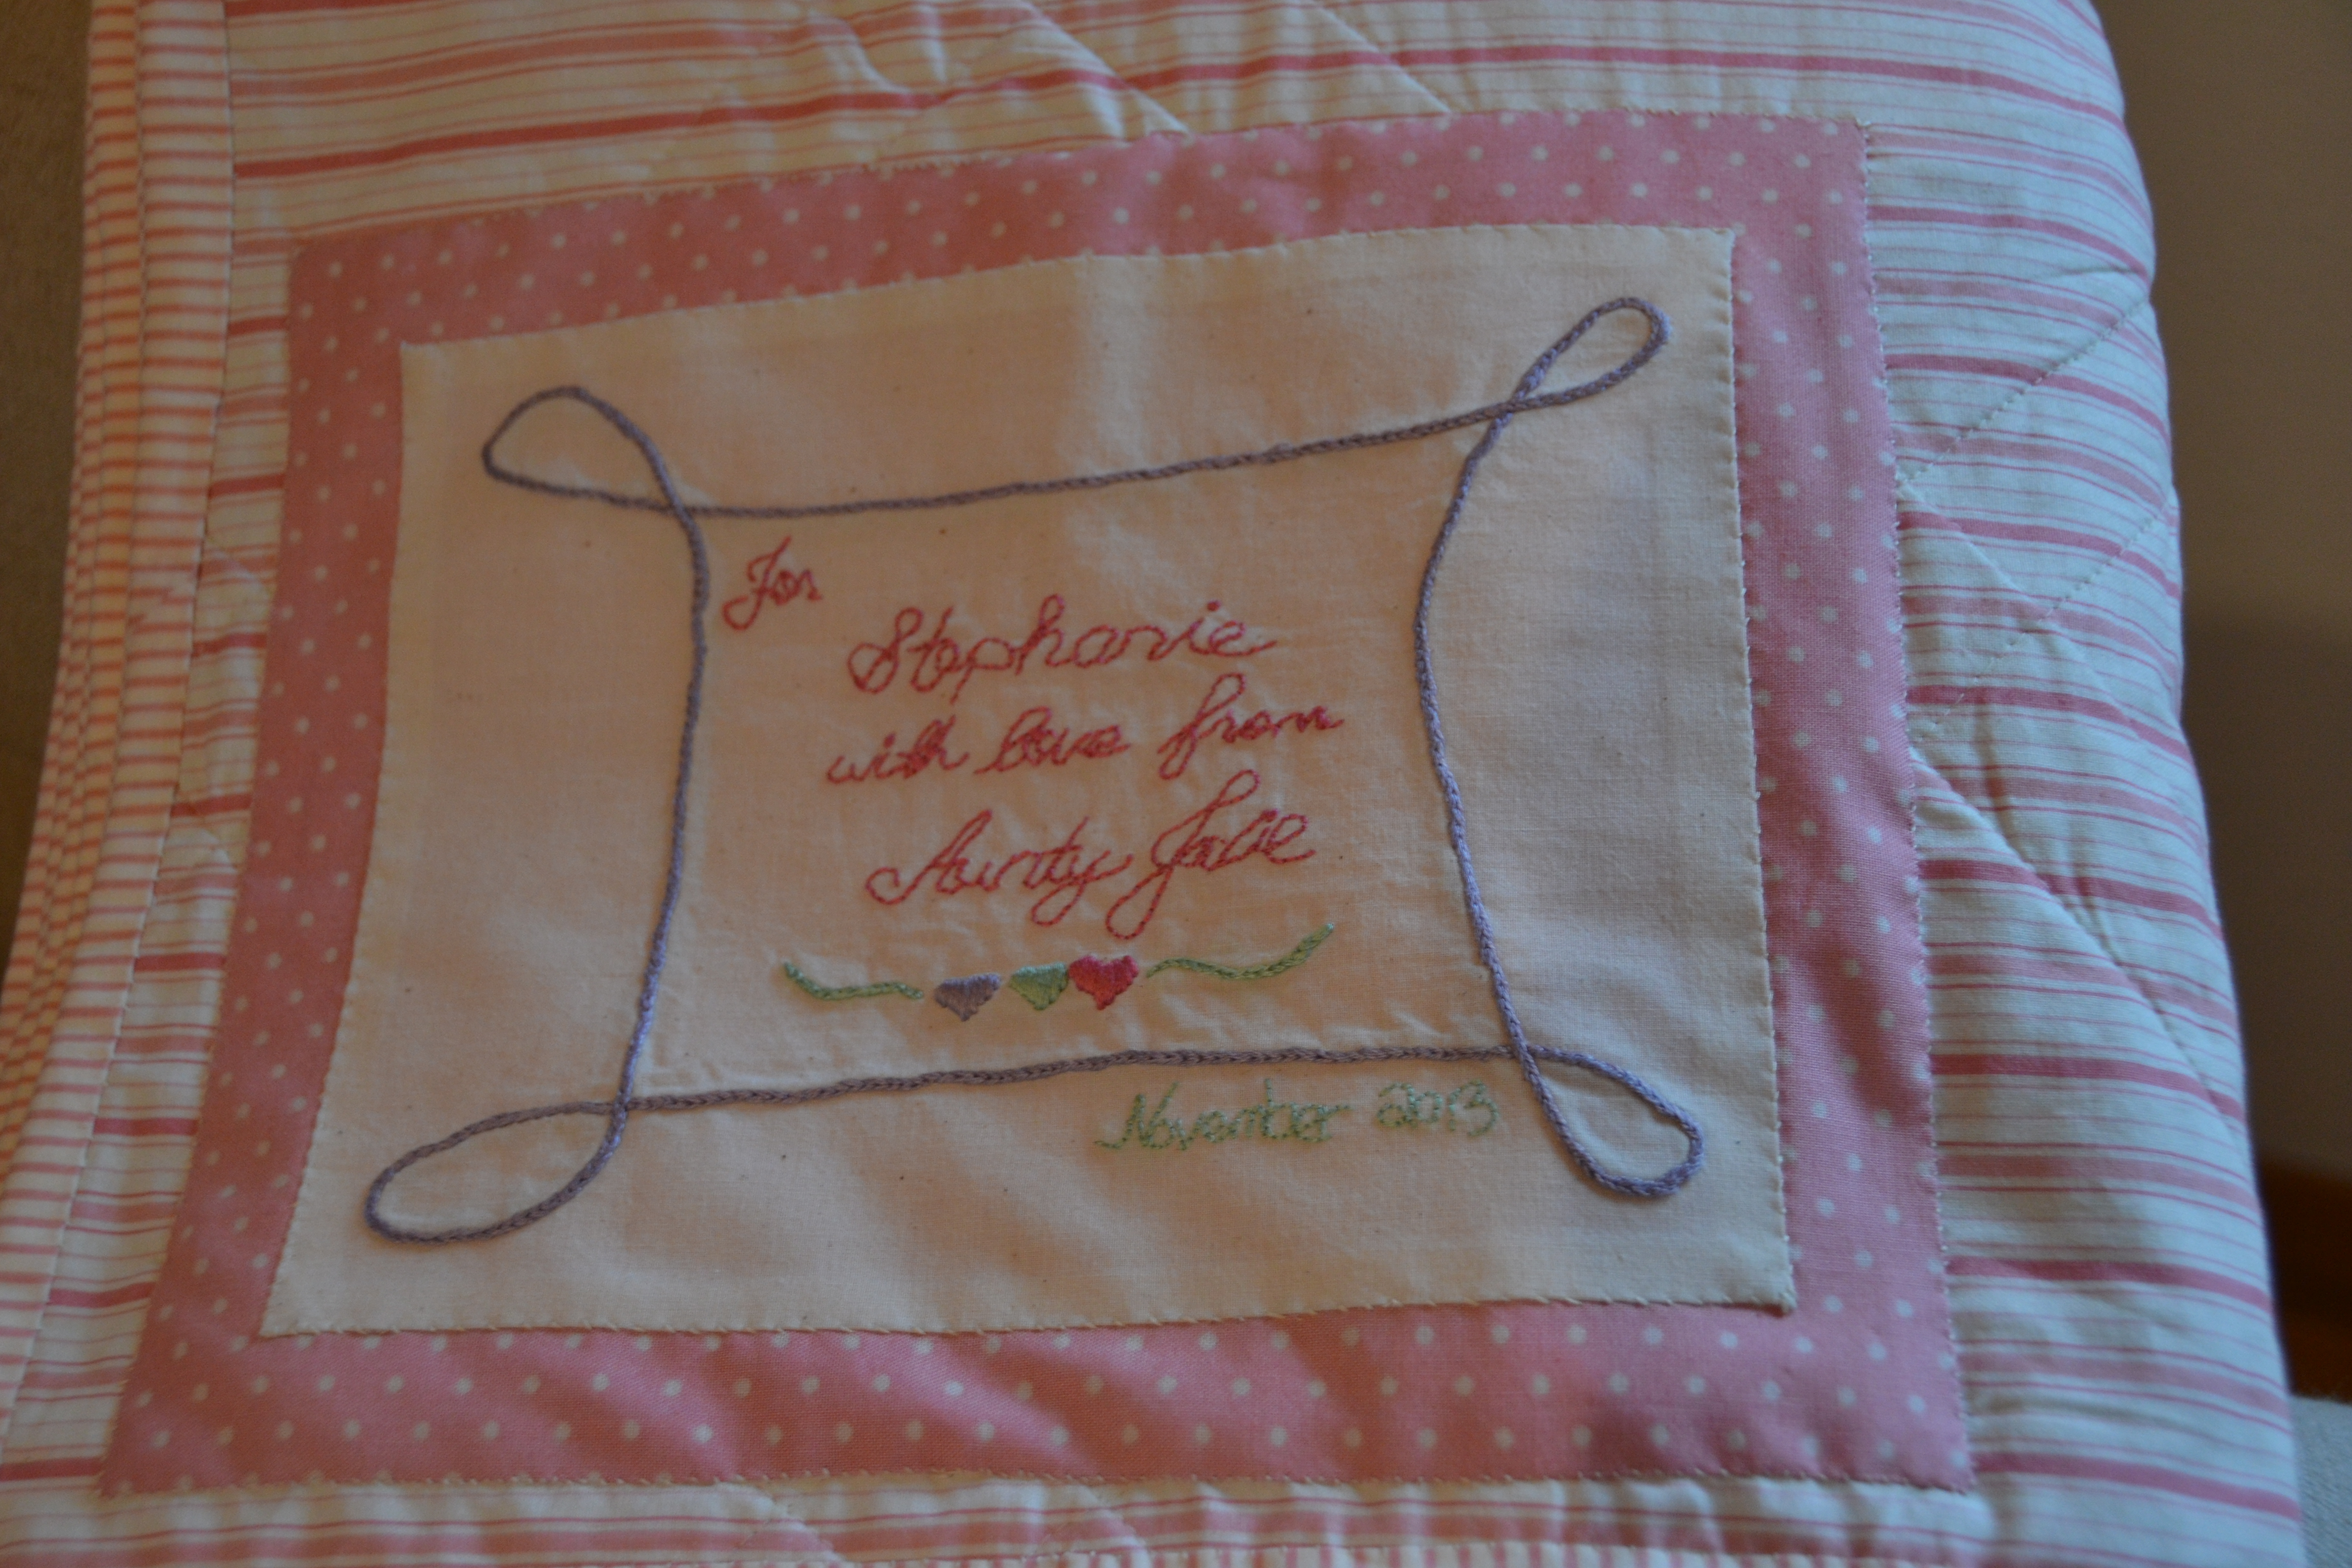
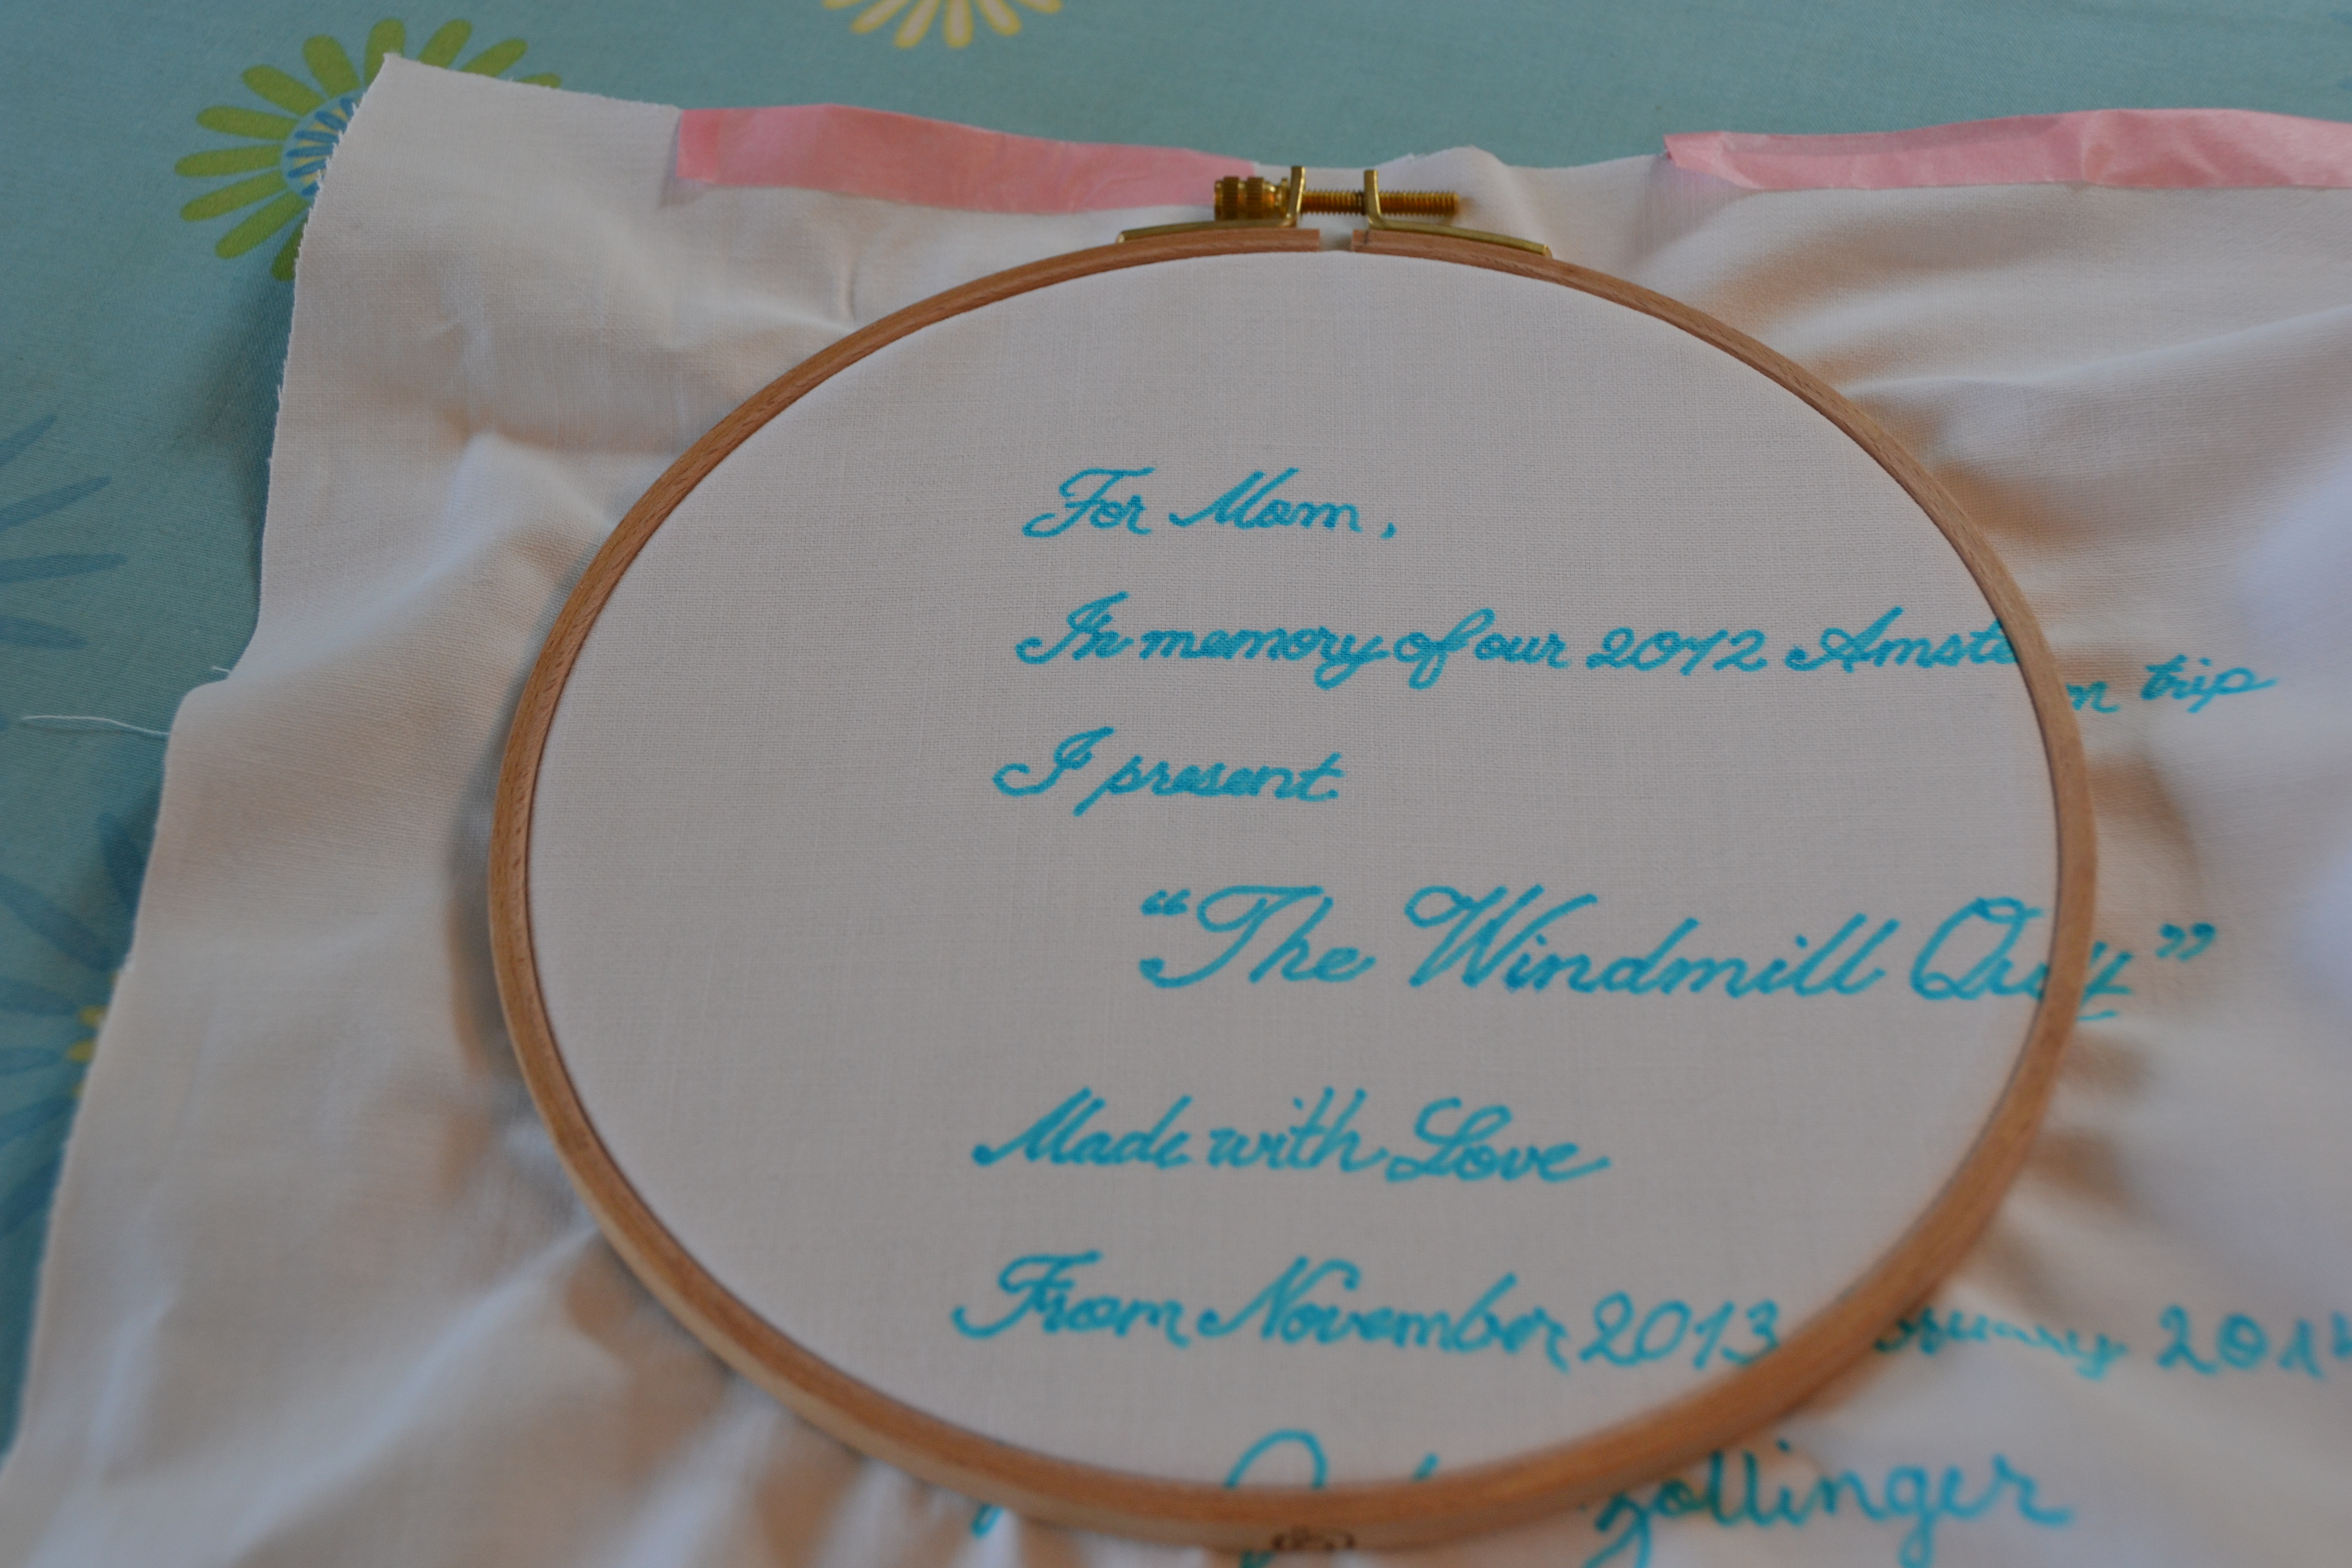
Here is some of the shots of the embroidery I did on my first quilt. I did it in my own hand writing, which proved a bit tricky to read in the end.
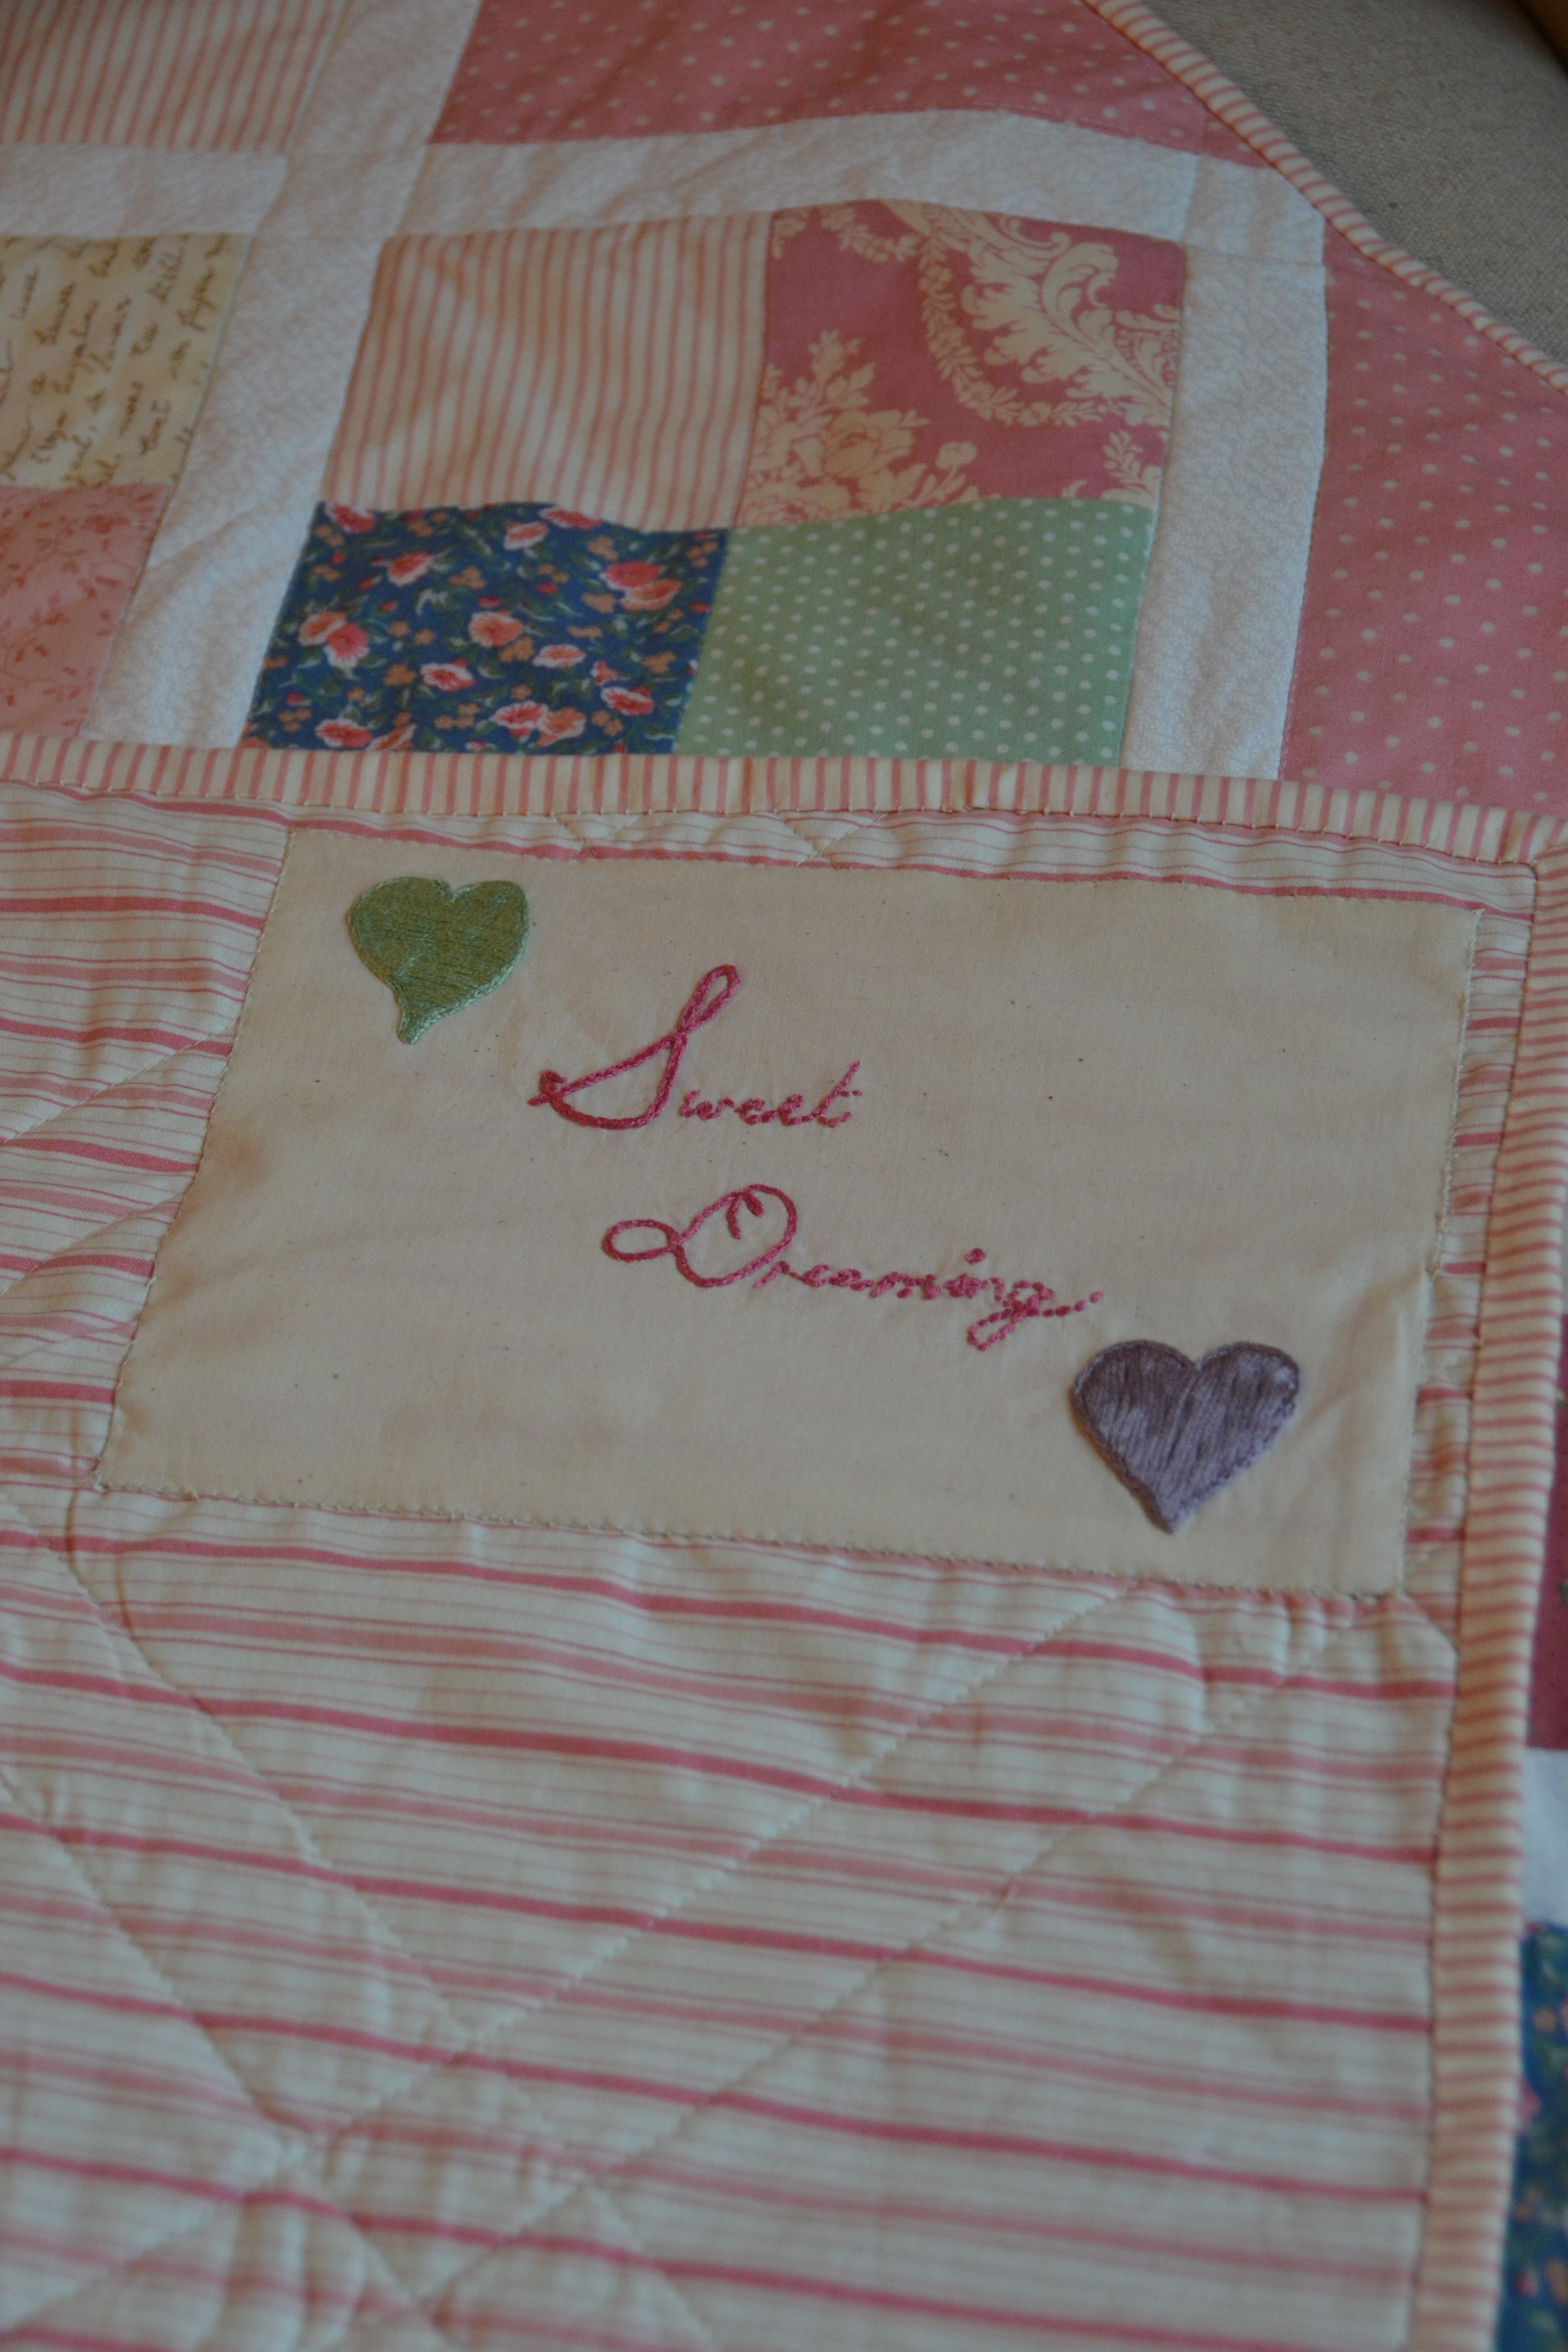
More recently I have done the following embroidery project to refresh my mind on the steps…

…before starting the next quilt tag.
You will have to check back to see how this comes out!
I can’t begin to tell you how much I look forward to this relatively easy step in the quilting process. First, coming up with my own design and wording and then sitting down on the couch with my embroidery hoop, a piece of fabric and my needle, threaded with some beautiful pearl cotton. I really love the ease and flexibility embroidery gives me as a creative tool, not to mention how relaxing it can be.
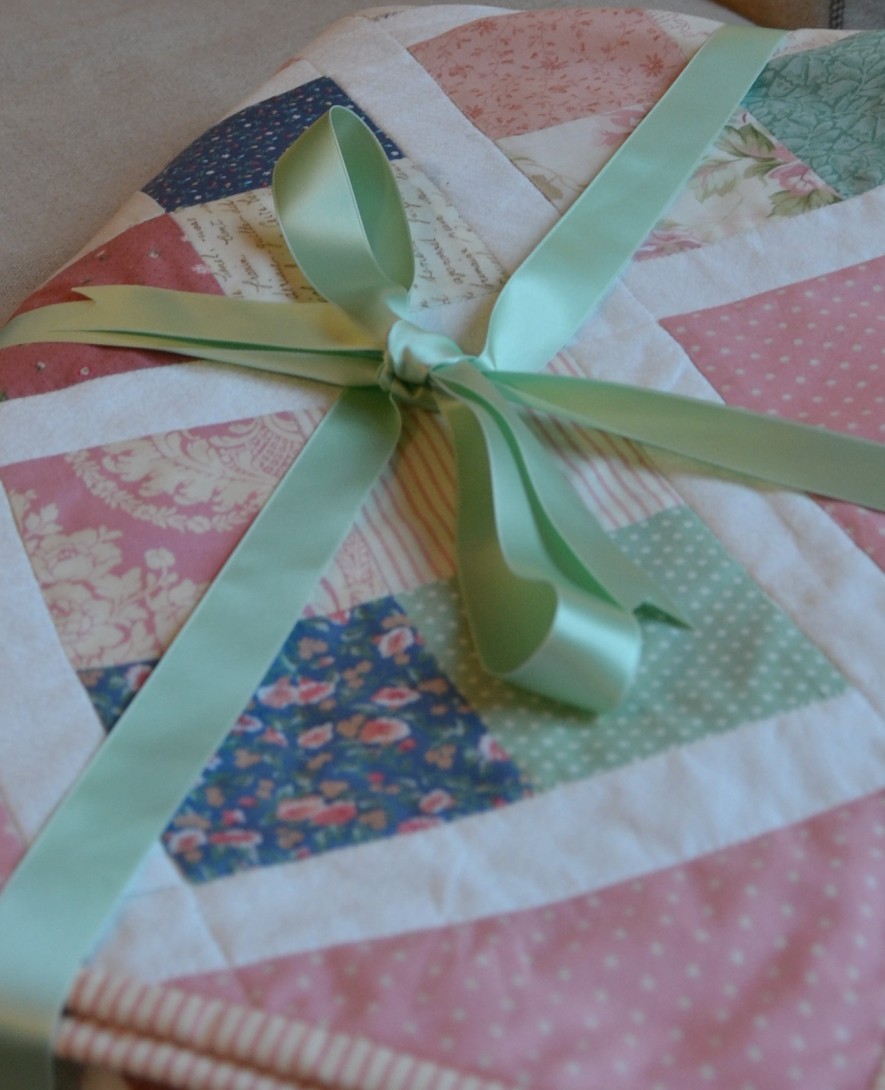
If you are interested in making your own quilt label I recommend you do your own search on Google or Pinterest for ‘Quilt tags’, ‘Quilt labels’ or ‘documenting your quilt’ to get some ideas and to come up with your own preferred method. Many people simply write on their quilts with the appropriate marking pen or create a printed label, while others go for the handmade look. Use whatever works best for you, the important thing is that it is clear who and when the quilt was made. You can go to my Pinterest Account here to see a bunch of quilt labels/ tags.
I hope if you haven’t already tried it, you too will be inspired to do so. I know some of you may be thinking “Oh that’s too much work! I just finished this enormous quilt and you want me to add yet another step and not only that, but to hand stitch it? You must be joking!!!” But let me tell you, once you give it a try, you will be hooked! Embroidered or not the possibilities with quilt labels are endless.
If you have any questions or comments, or would like to share with me your embroidery or/ and quilt label experiences, I would love to hear from you!
Happy Stitching!
Jodie


Leave a comment